How do I create links to URLs or web sites?
Add an external link to the lefthand menu
The Create External Link feature allows you to create shortcut links to outside web sites. Learners click on the link and are taken directly to the linked web site. You can create shortcuts to external links within the left-hand menu or on any content page, including content area, folder, and learning module.
Left Menu (or Site Menu) Option: This option method provides access from anywhere, because the left menu is available wherever users navigate in your course.
Make sure Edit Mode is turned on ![]() this is located in the top right corner of most pages.
this is located in the top right corner of most pages.
Step 1: Click the circular plus icon located at the top of the left-menu, then choose External Link.
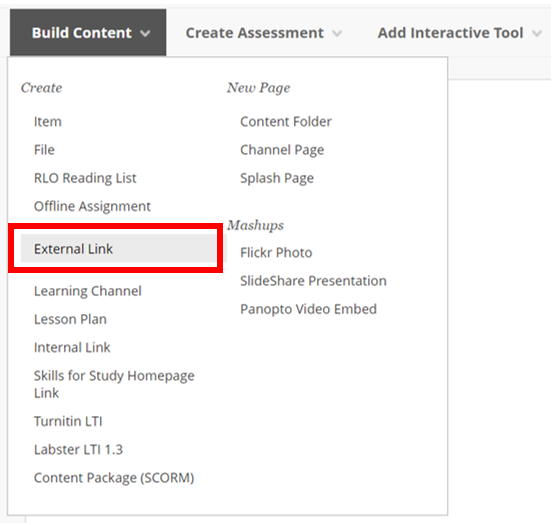
Tip: To create links to tools, use the Tool Link option. To create links to content items in your Blackboard site, use the Internal Link option.
Step 2: Add a Name for the external link box and add the full web address including the prefx such as http:// or https:// in the URL box.
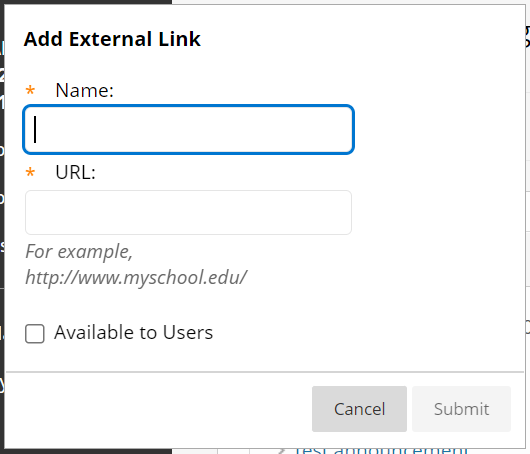
If you want this item to be visible students you can check the box for Available to Users.
Click Submit. The external link will appear at the bottom of the left menu and can be moved by hovering over the arrow to the left of the menu item, then clicking and dragging your mouse to the desired position in the menu.
Add an external link to a content page
You can add external links within a content page on your Blackboard site. An advantage of this method is that the external link is immersed within the same place as related readings, assignments, and other activities.
Step 1: From the left menu, select the content area to contain this link e.g. Learning Materials.
Step 2: Decide where to add the link: on the main page within this content area or within a folder on that page. If you want the link within a folder, click the folder to access it first.
Step 3: Mouse over the Build button, then choose External Link.

Step 4: On the Create External Link page, at a minimum enter a Name and URL (include the http:// or https:// prefix). You may want to add a description of the website or any learning goals or objectives in the Text field.
Additional options on this page are described at the end of this article.
Step 5: Click Submit.
Create New Link Additional Options
Open in New Window: decide whether to open the web site in a new window (Yes, recommended) or within the course page (No, default).
There are two main reasons you might want the web site to open in a new window: copyright concerns and ease of navigation. Opening a website within the framework of another is called framing and is frowned upon by copyright scholars. Many sites do not mind being framed. Educational institutions usually have more leeway than commercial organisations, but asking permission first is always a good idea. To be safe, choose to open the site in a new window. Opening a website in a new window also allows users to more easily move back and forth between sites without losing their place. Another consideration is personal preference: some people like having multiple windows open on their desktop while others do not.
Permit Users to View the Content Item: select No to restrict students from seeing this item. This will make the link unavailable, but will not affect the availability of the link if it can be accessed another way, such as through the Content System or in another Content Area.
If you later decide to add a condition (Adaptive Release rule) on this link that it should not display until students meet that condition (e.g., achieve a minimum score on a graded item before the folder becomes visible), then Permit Users to View the Content Item must be set to Yes, or else the condition is a moot point. This setting supersedes all Adaptive Release rules.
Track Number of Views: select Yes to turn on tracking statistics for this item, to record the number of times the item is viewed, when it is viewed, and by whom.
Select Date and Time Restrictions: if Permit Users to View the Content Item is Yes, then optionally set dates/times for when this item should appear to students and/or when this item should stop appearing. Enter a date/time or click the Calendar and Time icons and choose a date/time. Several combinations are available:
Set a future date/time the item should appear and stay appearing: check Display After and enter date/time but leave Display Until alone.
Have the item begin appearing immediately but stop appearing at a future date/time: leave Display After alone but check Display Until and enter date/time.
Set a window for when the item should appear and stop appearing: check Display After and enter date/time, and check Display Until and enter date/time.
When finished setting up your link, click Submit to create it. The external link appears at the bottom of the page.
Last updated: 20.12.22